Favorite Reads (aka blogs)

Not sure if it’s just our generation or what, but Drew and I are huge blog readers, obviously different genres of blogs though. Drew tends to read the tech blogs regarding everything from phone software, video games and computer things. While I’m a techy person, my blogs tend to be those related to design, design as in graphic design, home design, diy, and fashion blogs.

I’m assuming you are a blog reader hence why you are reading this, so I thought we’d share a few of our favorites and hopefully you can find a new favorite to follow along with this year…

Here are the links if you want to check them out…
Drew: theverge.com | imore.com | androidcentral.com | droidlife.com | anandtech.com
Vanessa: younghouselove.com | reidmore.me | mashable.com | bowerpowerblog.com | promisetangemanblog.com

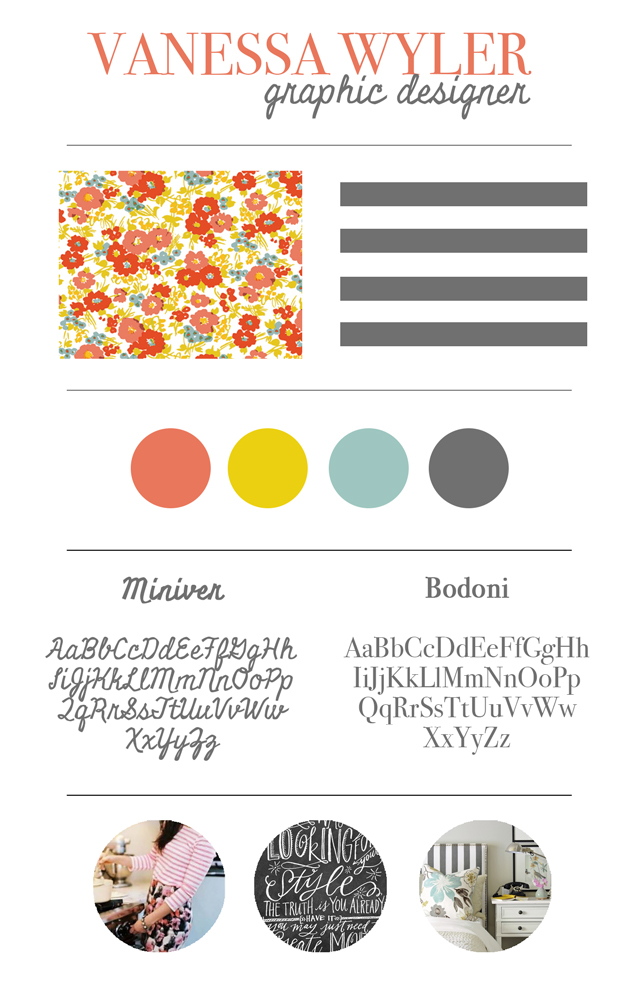
Moodboard | 2013 Goal Progress

I’m happy to report I’m making progress on a few of my goals for 2013.

I really want do a completely new site for myself to drum up more freelance projects. Part of that involved a new mac, yay! However, that also meant a new Adobe Creative Suite to purchase, boo. So instead of buying the software up front (over $2000), I’m trying out their Creative Cloud ($29/month) which gives me access to ALL adobe programs. While in the past I’ve only bought what I needed to complete my work, I now have access to brand new programs, which I’m hoping inspires me to learn a few and expand my knowledge. One of them being Muse – while I know how to design websites in Dreamweaver, Muse promises to do the same yet in a InDesign styled application and eliminates knowing code.

While I need to play around with Muse a bit before I can master it, I figured I might as well try to re-do my site by using Muse. Before getting full fledged into Muse, I need to come up with 1. A mood board, so that I know the design direction this site will go, and 2. I want to mock it up all in photoshop first and then recreate in Muse. I know this might seem backwards, but since I know Photoshop way better, I can quickly get my dream site laid out before heading over to Muse and am completely lost for a bit while I learn.

So step 1 is complete, introducing my mood board (above). A moodboard really helps set the tone for the site, I felt really lost until I had it clearly laid out and how it would look together. If you compare it to my current site, you will see the similarities. I feel like this is completely my style still. What I did to confirm my design and style is, I headed on over to my pinterest account. In there I took a look at trends in home style, design, and fashion that I’ve pinned… stripes, floral, primary colors, etc. From there I could tell my style was still dead on, so I embraced the color scheme and patterns.

Next up, my site designed in photoshop, then translated to Muse! I’m hoping as part of my etsy shop launched, I have options for people to have me customize their blogs similar to this. I’d come up with a moodboard for them, and then translate that to their blog.

Goals for 2013

The first of every year is a good time to reflect on what’s working for you and what’s not… what you had hoped to do in the past 365 days and what you forgotten about. I’m not one for making resolutions, but instead setting some realistic goals. So before I crank out the list for this year, let’s see how we came out in 2012…

TOGETHER GOALS FOR 2012:
1. Pay off Vanessa’s School Loansliterally finished this on the 31st
2. Take a vacationcruise!
3. Save up for a down payment on a house! – check and we bought one, so we should get bonus points
4. Get better at doing our laundry and keeping our house cleanso so on this, could use improvement still
5. Go rock climbing together – fail 🙁
6. Start to pay off Drew’s loans – Luckily we don’t have to start paying these until 1/8/13

DREW’S GOALS FOR 2012:
1. Graduate MSOE
2. Start at Milwaukee Tool
3. RelaxTook the past 11 days off, I’d say he’s relaxed

VANESSA’S GOALS FOR 2012:
1. Read a book in entiretyHunger Games 1 & 2
2. Blog more to document our livesSee for yourself
3. Sew something
4. Do less freelance

Now for 2013
TOGETHER:
1. Save up 3-6 months salary for our emergency fund
2. Pay off 1/3 of Drew’s school loans
3. Invite people over more to hang out as couples
4. Get a laundry schedule together – and fold after washing, not 2 weeks later
5. Go on a mini-vacation somewhere close

DREW:
1. Start Grad school in the Fall
2. Go to China for work
3. Hang out with my brother-in-laws more

VANESSA:
1. Enter a Minted design contest
2. Get my design etsy shop up and running
3. Get my car washed more
4. Finish updating my freelance website in hopes to do more this year
5.  Sew something
6. Draw/sketch more
7. Visit my sisters in MN and IL

HOUSE:
1. Finish painting trim white throughout house
2. Start and finish kitchen remodel
3. Update upstairs bathroom

Fingers crossed we can stick to these goals!

Christmas Chalkboard

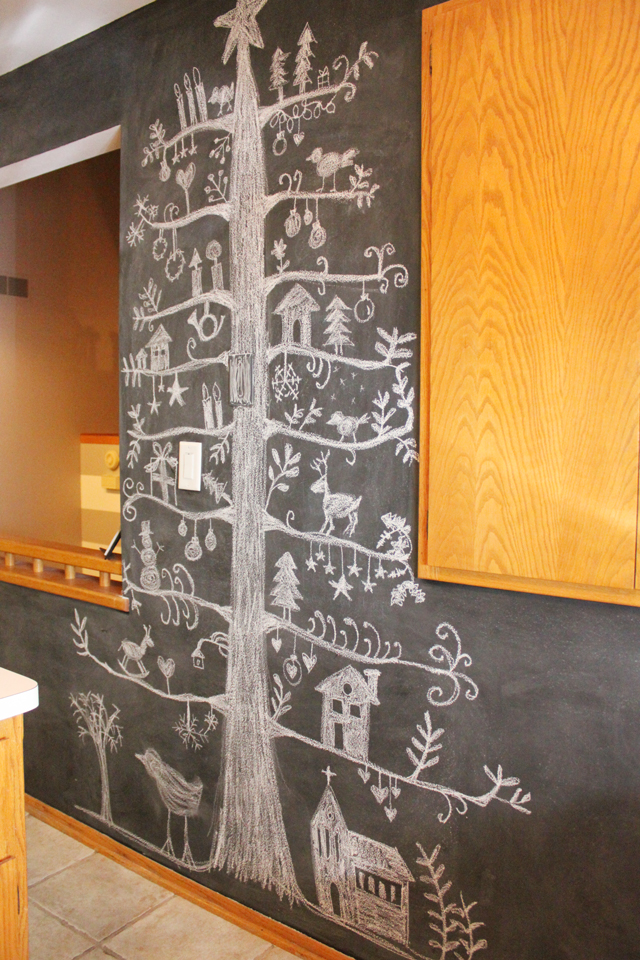
In the age of pinterest, you don’t have an excuse to not try to decorate every nick and cranny with Christmas decor. And with having a chalkboard wall, I figured I’d at least try to do something festive related – especially since we are having people over at our home this Christmas.

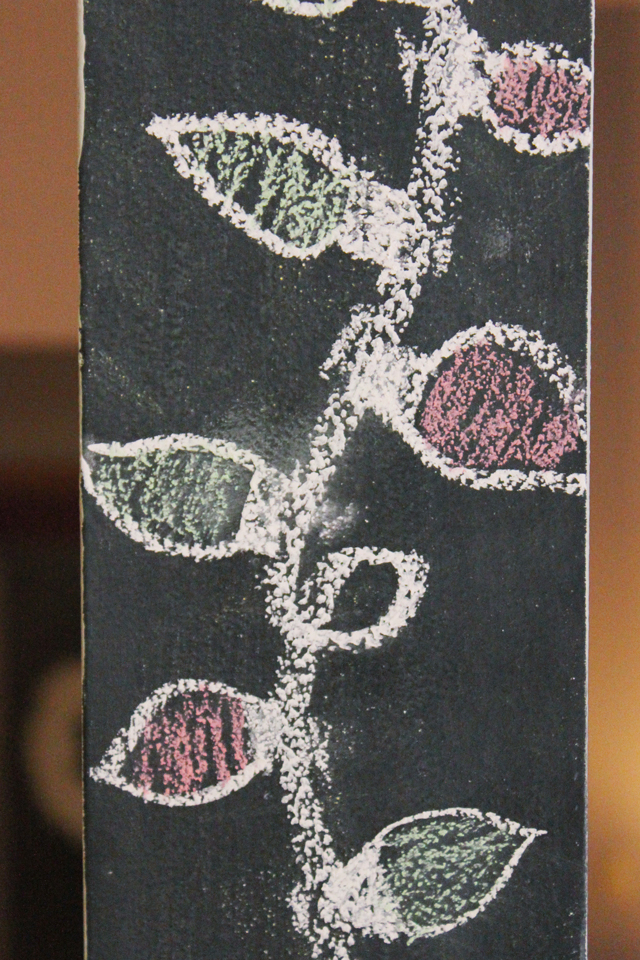
I borrowed the idea of this chalkboard tree, but then the chalkboard lights were my own idea. I had been waiting for the perfect thing to add up to the top part of the wall and the post and totally joked to Drew that look at the lights I just hung in our kitchen.

christmas tree chalkboardchalkboard wall decoration treechalkboard wall lights idea christmaschalkboard idea lights christmas


Remembering Miriam

When we were first house hunting, a sweet old lady and friend had passed away – though it was her time, she was well over 90 years old, she was the most precious little lady and is very much missed by many. Here is a photo of her from our wedding in 2010.

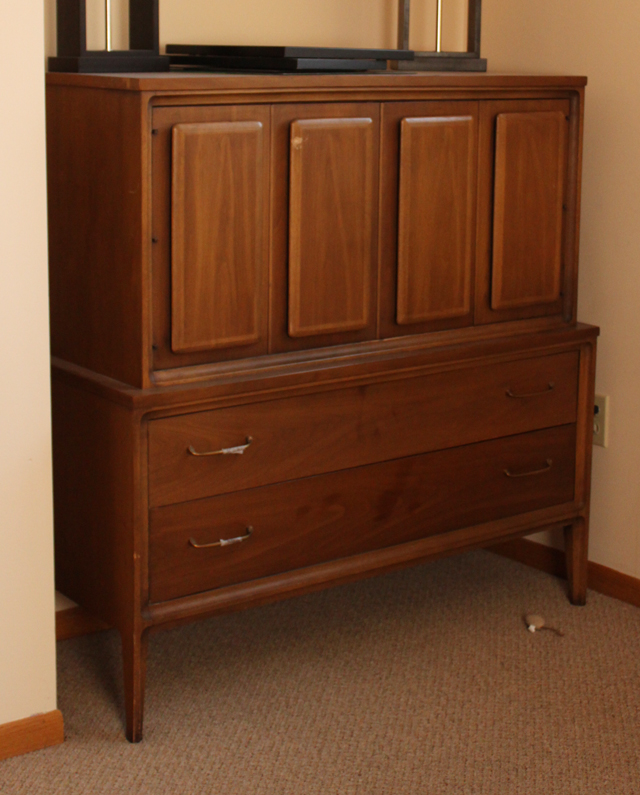
wedding photo candid mariamShortly after she passed, my mom was contacted by her relatives that they had a bunch of her furniture they were selling. Knowing we’d need much more furniture to fill our future house, I decided it would be a great opportunity to remember her and to get some really great mid-century modern furniture. It was also a steal of a deal, only about $300ish for two dressers, a hutch, a credenza, two night stands, a headboard and bed frame, and dining room table with six chairs. Some of it was in great condition, some had seen better days.

mid century modern decorated hutchCurrently, the hutch is in our kitchen which is holding a lot of extra dishes and kitchen appliances and showcases some colorful pieces. This one is in pretty good shape, a few dings, but I could probably easily get them out without having to start from scratch. It also has a laminate piece that wouldn’t sand and stain well anyways – and the color works in the space.
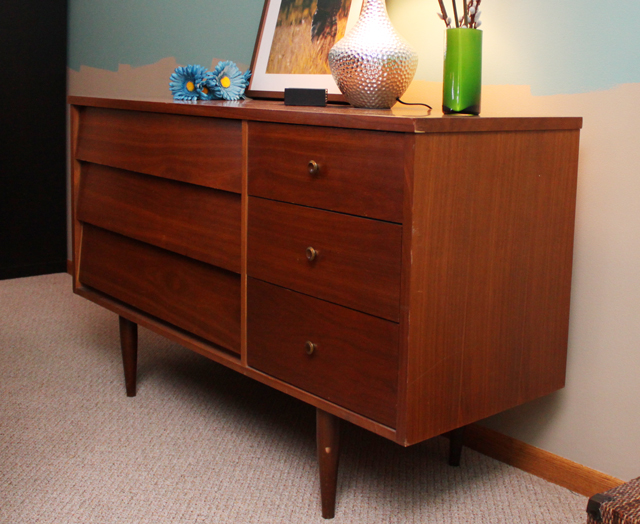
mid century modern cradenzaThe credenza is currently in our family room acting as a place to hold a lamp, decor and inside board games and puzzles. This one is also in pretty good condition. It is on my list to do something with it some day – no rush on this one though. I’m thinking about painting it somehow because it also has a laminate piece that won’t sand or stain well.
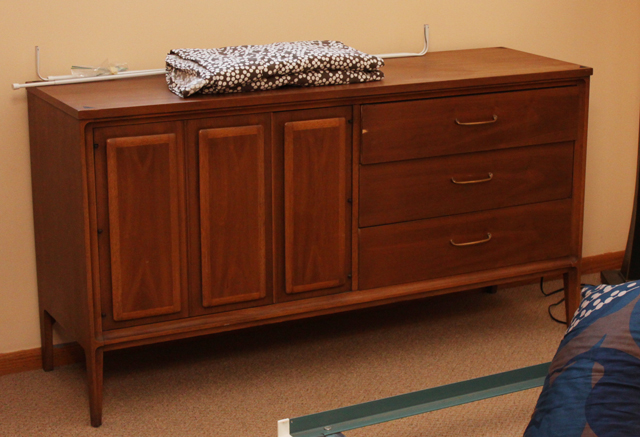
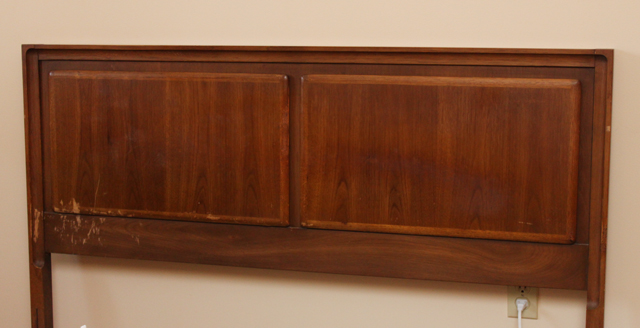
mid century modern dressermid century modern tall dresserThe dressers and the bed frame is in our spare bedroom downstairs. They are neatly positioned, but the room right now is just a dumping ground for excess stuff. Someday we’ll get to it.The kitchen table and chairs need a new home. We got them before we even knew what house we are getting, but we just don’t have a good space for them in this house. I’m still deciding what I want to do with them – they may very well end up craigslist. They are chilling in our basement until then.

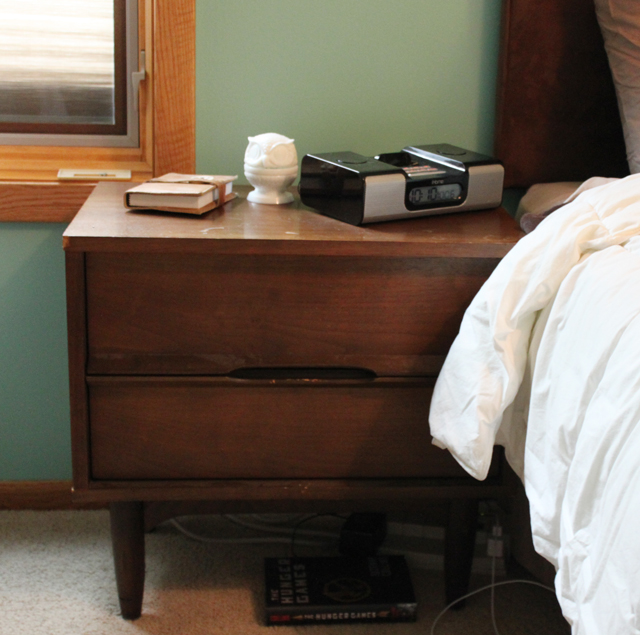
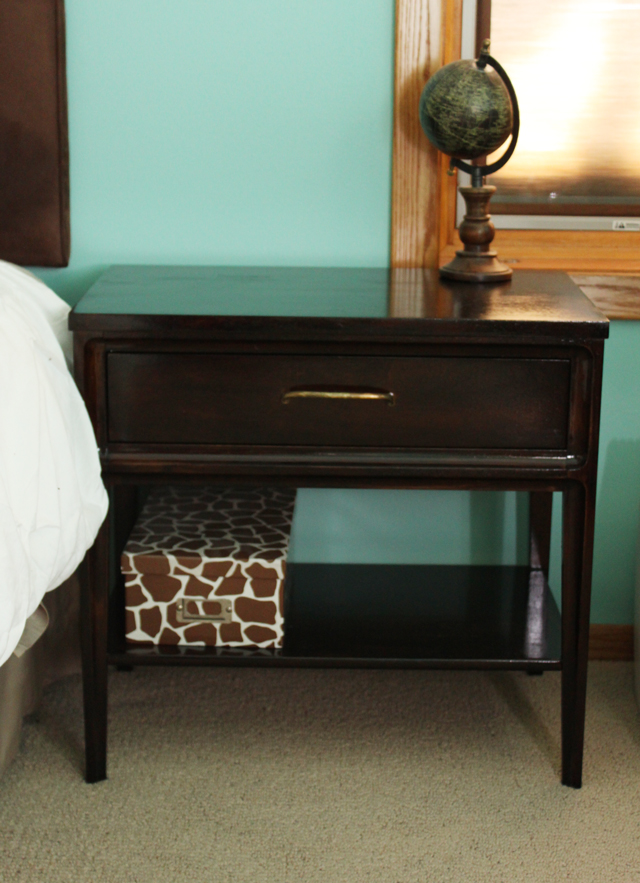
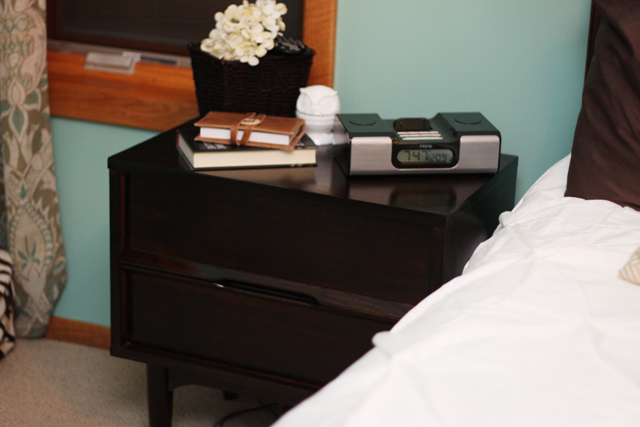
Now onto the nightstands. Those found a home in our bedroom because we were previously just using Ikea Lack tables and those aren’t the greatest things in the world. These two nightstands didn’t match, but that is what also makes them more unique. However, they were pretty badly damaged with water stains and chipped pieces. They also were a much lighter color than our dressers in the same space. So I decided I’d try refinishing them. You know because I’ve done it soo many times before. Ha.

So based on my extensive research (ha.. or pinterest), I picked up sandpaper, stain in the jacobean color, and some water-based polyurethane. After sanding for a few minutes thinking this was going to take an eternity, I remembered my dad had an orbital sander. Dad to the rescue! That helped speed things up a ton. However since this was my first time refinishing a nightstand, I learned the hard way how deep you actually have to sand it to get it to accept the stain evenly. Because of that mistake, after staining it, the stain was really sticky and I had to basically re-sand everything.

Once I finally had it sanded properly, I applied two coats of stain – wiping them off each time after about 20 minutes and waiting a day in between. Then after everything was good and dry, I applied three coats of poly, waiting a few days in between for everything to dry completely. I also then waited another 3 days before I put the nightstand back in our bedroom ready to be used.

It looks a million times better, there are no more water stains or marks and it now blends in better with our other furniture. I just finished the other nightstand the other day as well – it too looks a million times better and the process went much more smoothly thanks to my lesson learned.

Check out the before and afters below:
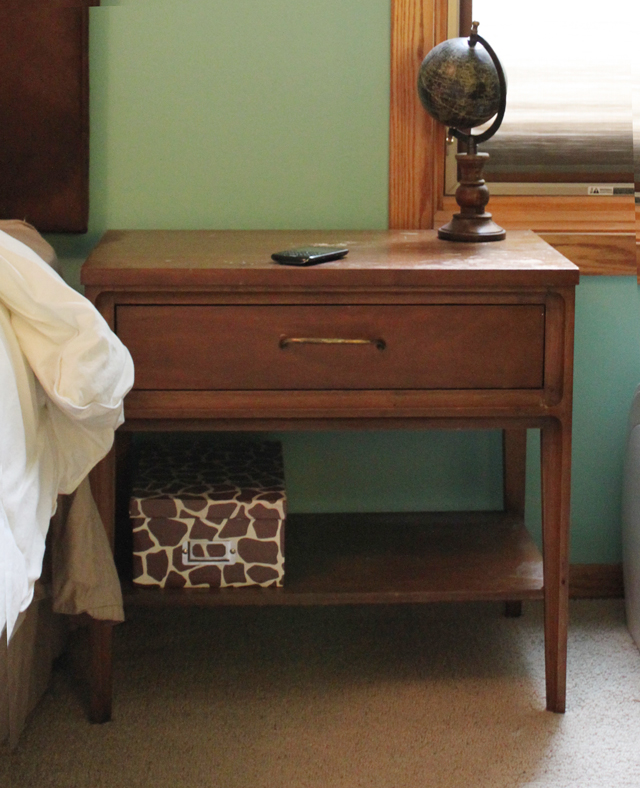
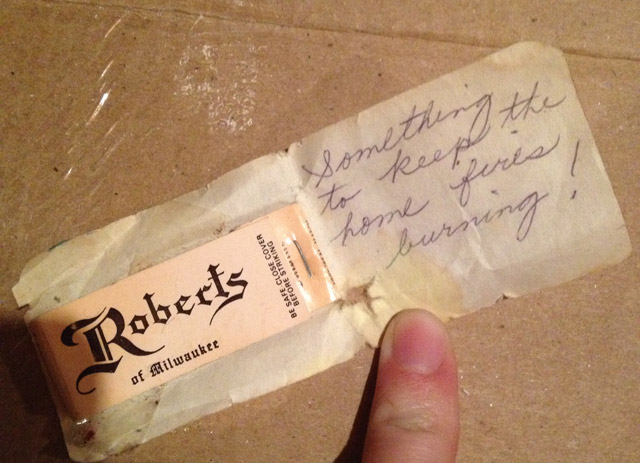
mid century modern night stand before and aftermid century modern night stand before and aftermid century modern night stand before and aftermid century modern night stand before and afterAnother fun thing, I found a bunch of random things hidden in the nightstands – they must have fallen out of the drawers at one point and got caught in between. Such cute little notes and memories. This one was a set of matches with a note from someone that said “Something to keep the home fires burning!” and the matches were from Roberts Restaurant, I believe an old historic restaurant in Milwaukee, that is no longer there.
roberts-milwaukee-photoI think it would make Miriam very happy knowing that I ended up with a bunch of her old furniture and I’m very thankful for the opportunity to have it!

Project: Add Privacy to our Front Door

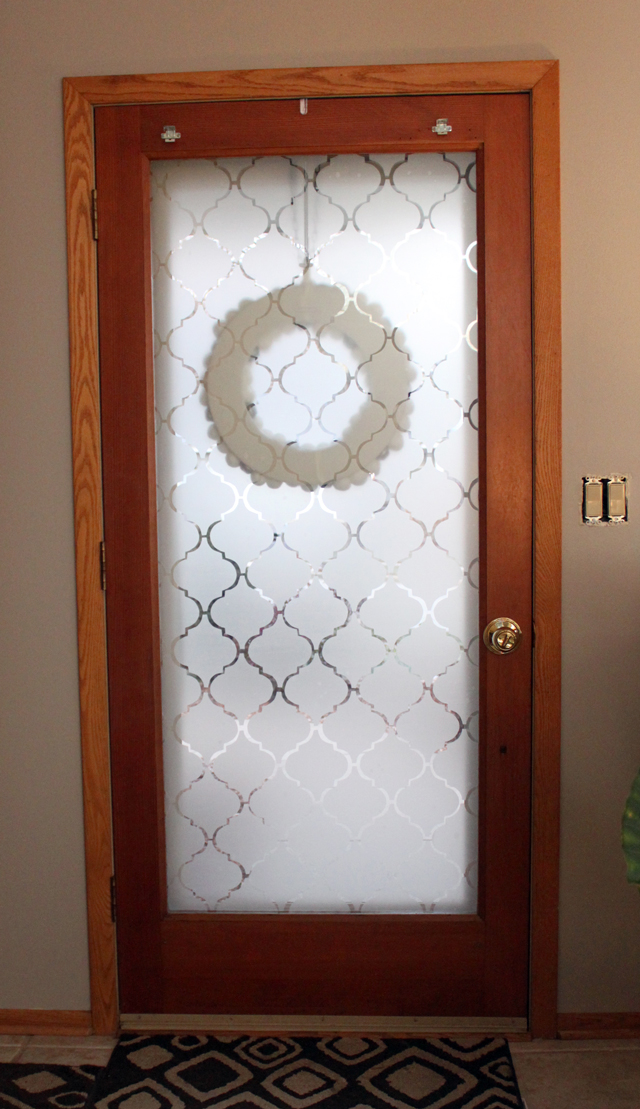
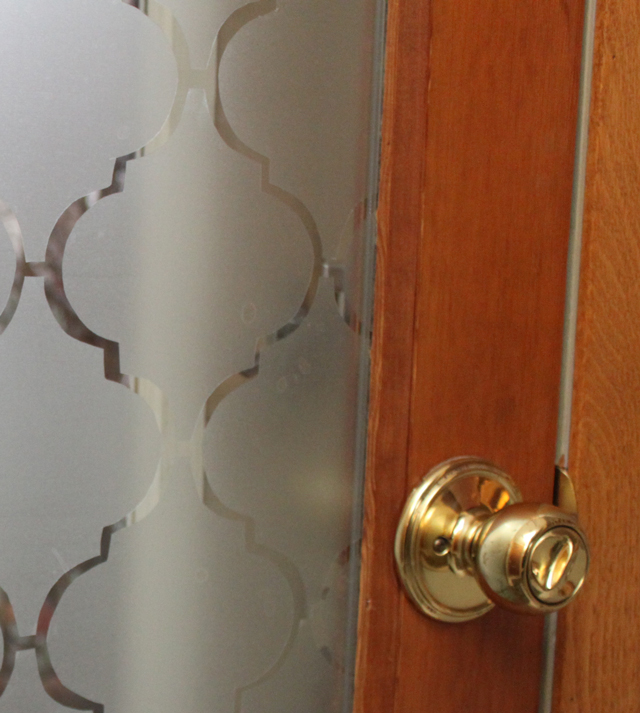
Yay! One project that is done in it’s entirety. It feels like so many projects in our house are unfinished, so it feels really good to check one off the list for good! And it looks way better than what white blinds looked like.

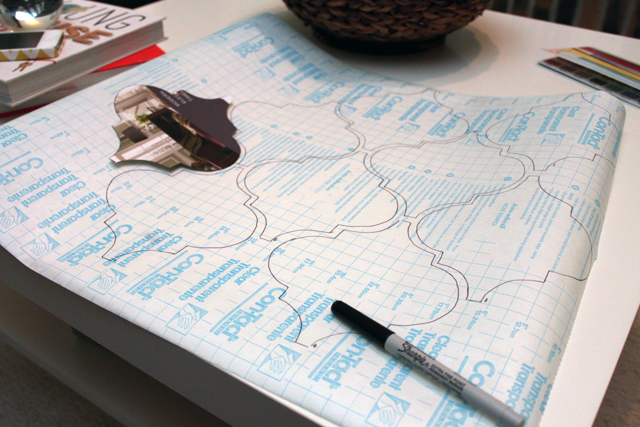
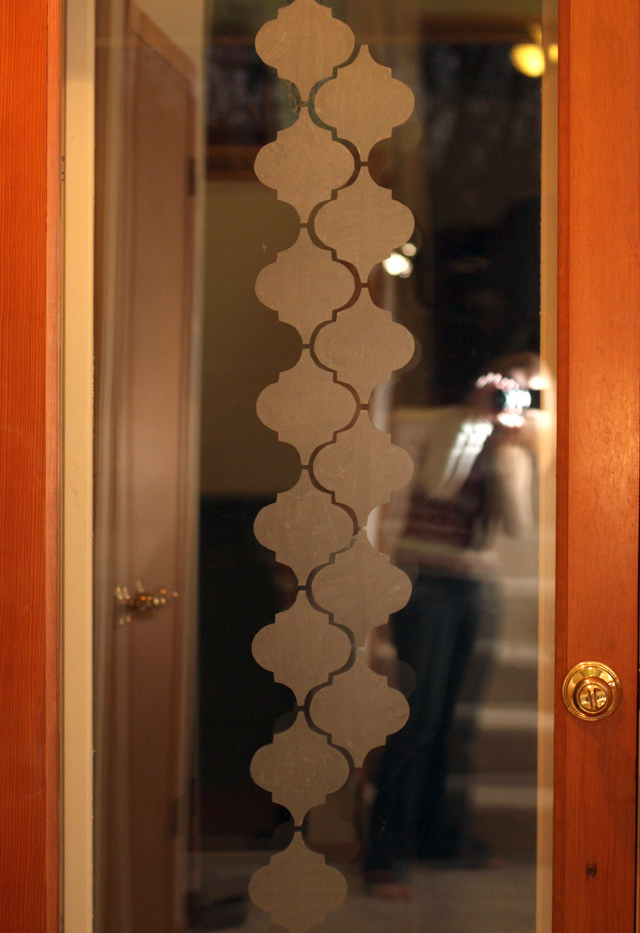
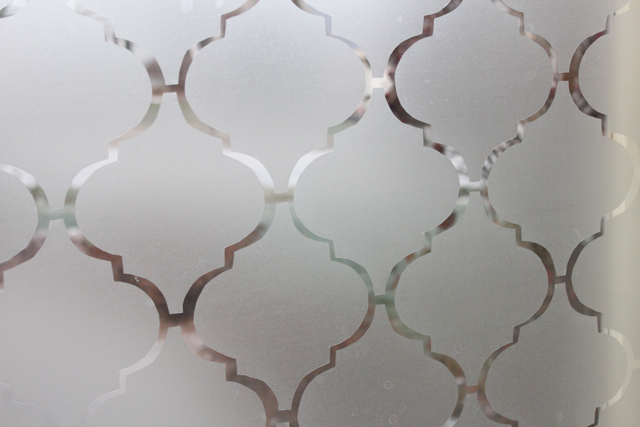
This project spanned over the entire week, but put the finishing touches on this past weekend. On Tuesday, I began cutting out the million little shapes. Somehow when I was first calculating how many I’d need I got 43 – yea way off, there are actually XX on the door now. Each night I would cut more and more out until Saturday when I started applying them to the door.

I then kept cutting more and more until I had just enough, I even got Drew to cut out eight of them, go teamwork! The project overall was pretty easy, my hands just got tired from the scissors and lining them up on the door is a bit tricky, but I eventually realized this is a hand-made project and it’s not going to be perfect and it adds some character not being perfect. Though from a-ways back you can’t even tell, then it looks perfect! Only when you are up close examining it do you see some spaces a bit wider than others.

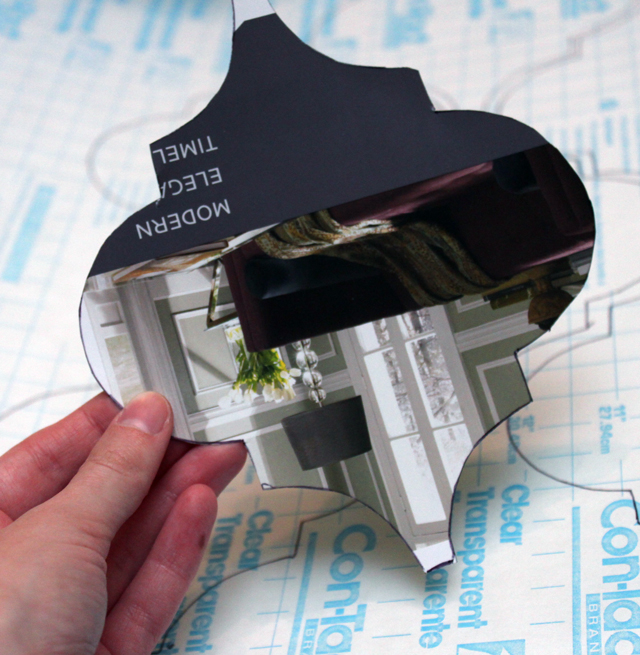
The best part of this project, it only cost me the amount of a roll or contact paper ($3 ish) – and I have over half a roll left for some other project down the line! The project was inspired from this blog – and she’s got lots of tips and even a template to use (which I did).

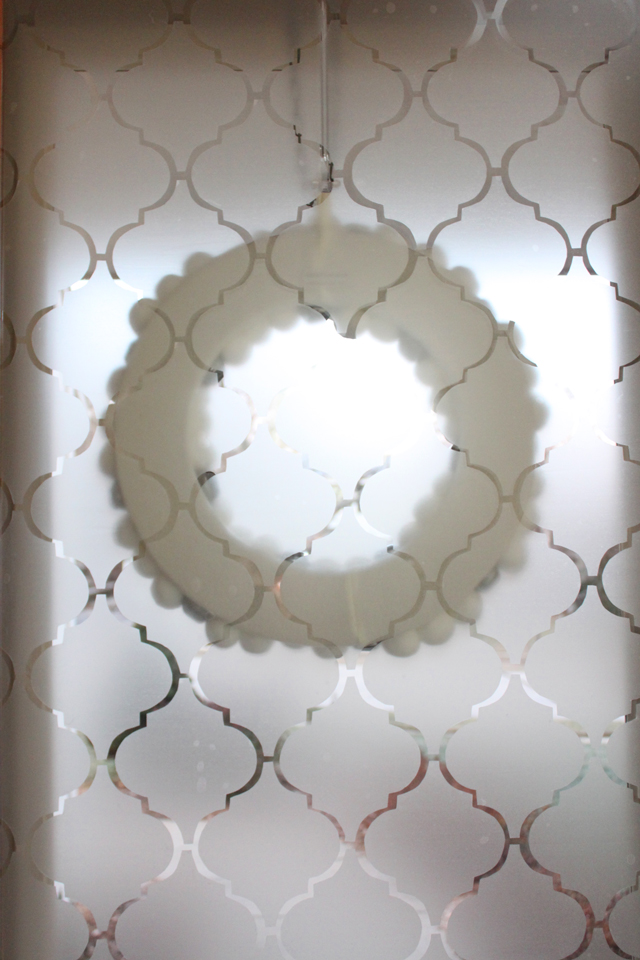
Love how this adds a subtle pattern to the space (inside and out) plus its way more attractive than blinds and adds privacy, which is needed for that door! Yay contact paper!

Happy Home Challenge

A few weeks ago I came across this article on Apartment Therapy titled, 10 simple things that will make you happier at home. Not that I’m unhappy at our new home – but at that point in time when I read it, our home was a disaster just after moving – and some parts still are. So if I could do a few things to make myself less crazy, I figured it’s worth trying. Some of the ten things on this list are… make your bed everyday, as you leave a room make sure it’s left picked-up, embrace the daily chores such as doing the dishes and laundry, and doing small favors for your spouse and family daily.

So I created a challenge for myself to follow those rules daily….

1. Make your bed daily – I have got in a habit of doing this and it is amazing how great it feels to come home to a clean room and it literally only takes 2 minutes in the morning. However, I do skip weekends (unless we are having company) or days like today where Drew had off and was still sleeping when I left for work.

2. Picking up each room as you leave it – I’m trying hard on this one, but it doesn’t work if the other people you live with don’t follow the rule as well – so this is a work in progress. Doing this daily helps for when you have to clean the entire house, you don’t spend the first part of it putting away clutter.

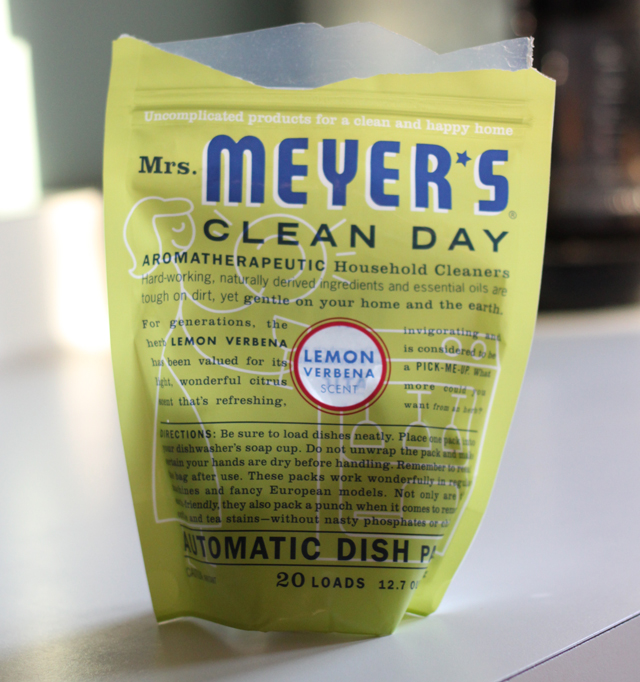
3. Embrace Daily Chores – Dishes and Laundry. I have got the dishes part down. I usually load it up before bed, hit run and then empty it before I leave in the morning – unless days like today where I completely ran out of time. I also have discovered that if your dishwasher isn’t cleaning well, the to 1. Clean it (look it up on pinterest) and 2. Switch detergent. I recently tried the Mrs. Meyers stuff and it works miracles – my glasses that were so cloudy and gross are now crystal clear everytime – try it! The laundry part I have yet to get down… my goal would be to, put a load in the washer as soon as I get up and then go-thru a full cycle. Then I’d quickly load it into the dryer right before I leave. Then upon getting home at night, quickly fold AND put away the load. Sounds soo easy, huh?

4. Do small favors/acts of kindness for your spouse – I think this one is the most important – not only will you feel better about yourself, you’ll make someone else happy. If I ask Drew if I’m doing this, I’m sure he’ll say no, and that probably is correct. I’m sure there are small things I do that I do out of habit and doesn’t even notice because they are my normal things like…. make coffee for both of us in the morning, make dinner, and go grocery shopping. I’d like to go above and beyond those things I already do though – like I did on Saturday, got him a drink from Starbucks on my way home.

So you could say these are my new years goals… but I’m just starting them early this year!

The Perfect Gray Paint

Unfortunately, the perfect gray paint does not exist…however the right gray does – but it will take you about 10 paint samples in order to find it though, unless you are lucky. Sorry to burst your bubble.

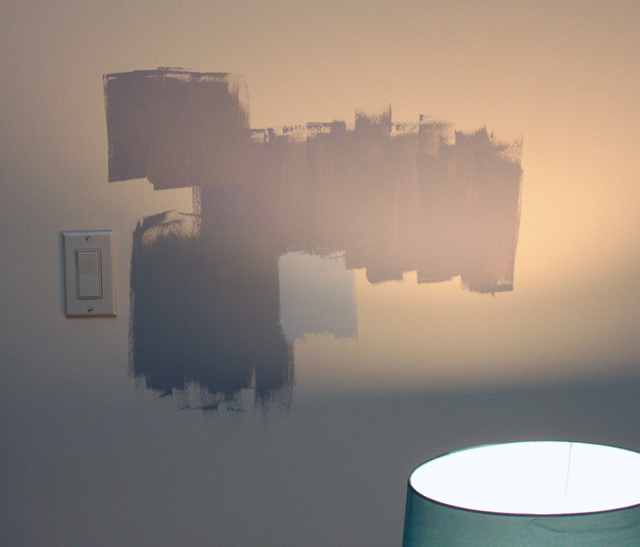
So my search for the right gray for our living room is hopefully over (I just have to compare it to our curtain sample before purchasing). We moved in a little over a month ago, and at the time I slapped a sample on the wall that I thought would be perfect. However as time went on I kept seeing purple (and I am not a purple fan). So that gray (SW Pewter Cast) was out.

Next, I searched on pinterest for grey rooms I liked that provided their paint choice, so I tried Martha Stewarts Flagstone Grey. It was similar in color, however had more browns in it versus a purple undertone. I also tried Benjamin Moore Rockport Gray after I had seen it in Young House Love’s room. Also, once we got the massive Ikea Karlstad sectional in the Sivik dark grey in there we realized we should go lighter on the walls to provide contrast.

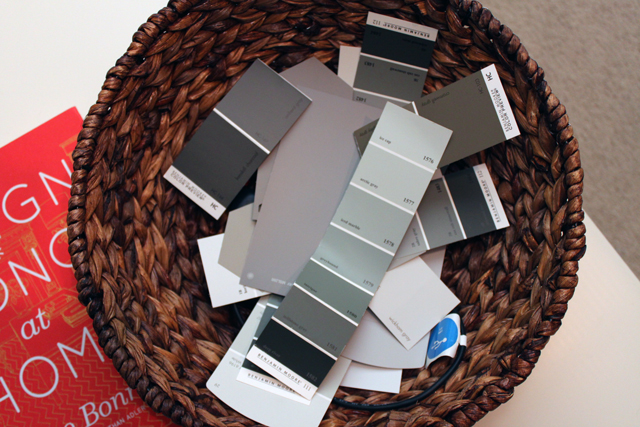
Then I pinterest searched some more, got some sample and kept getting them all wrong… too brown or too purple. I honestly thought it would just be swatches of gray on my wall forever. I finally took a look at all my swatches again and came back to one I had picked up a long time ago. Its a lighter gray with a bit of brown too it, but a blue/green undertone as well – it also worked well with the color of the couch and the mustard yellow in our throw pillows.

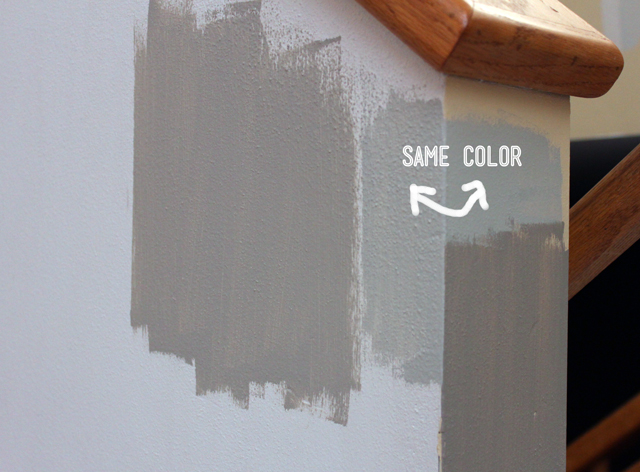
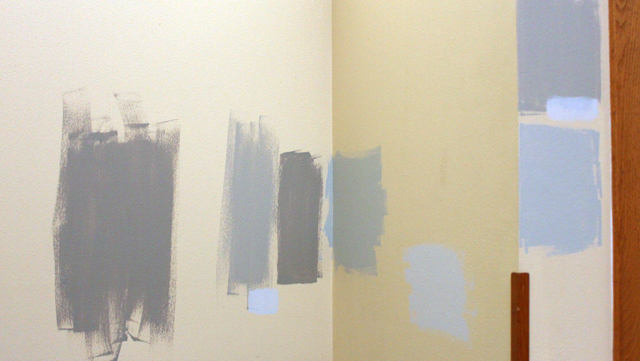
I got a sample and was so excited to finally find the right grey. I painted it on the walls and it was soo blue and I was sad. Then the lightbulb came on…I realized it was most likely the yellow walls surrounding the swatch and peeking out behind it that was causing this illusion. There is a color theory I learned back in my graphics color class, that colors look different when they are next to other colors. So then, I tried painting in on the white stairway wall that the sellers never painted. It was then perfect…. If only I had realized that before.

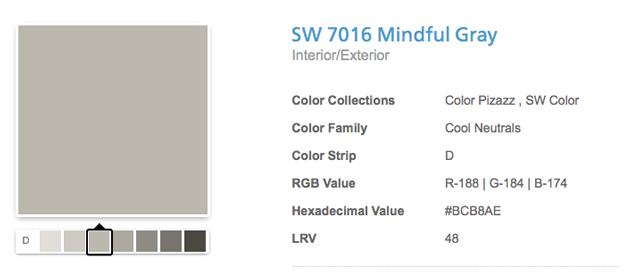
So here is the gray we are going with. Sherwin Williams Mindful Gray – however we’ll get it in Behrs Paint + Primer because we’ve had so much success so far with that stuff. Covers in one coat no joke and I know I don’t want to be painting this room’s massive walls more than once!

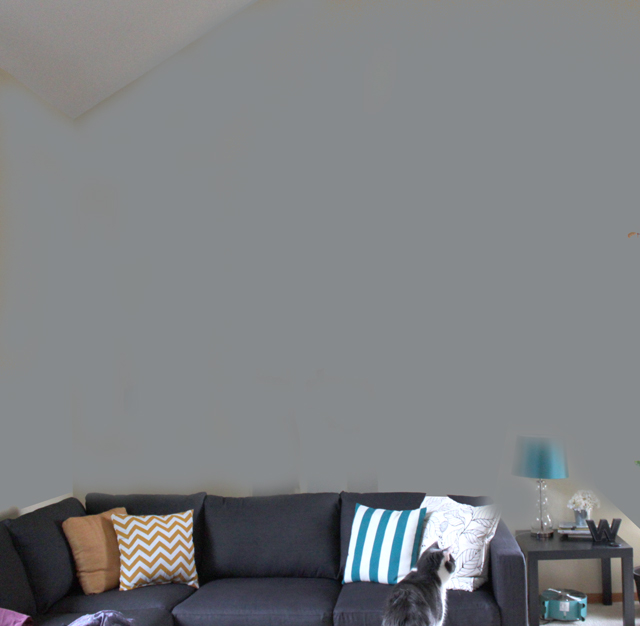
mindful grayAlso, part of the process included taking a photo of the swatches and painting the wall in photoshop. Here was my quick attempt to visualize it. Though…. I still think it’s not quite right in the photo – it’s much brighter and lighter.

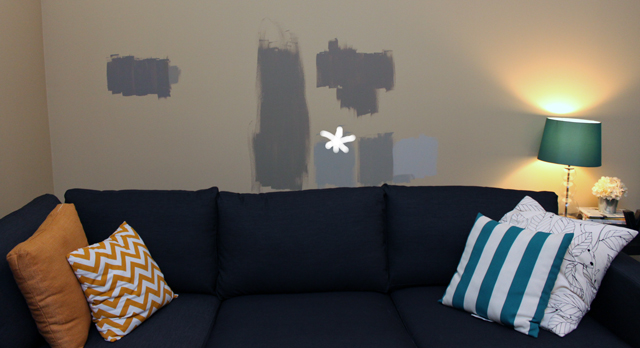
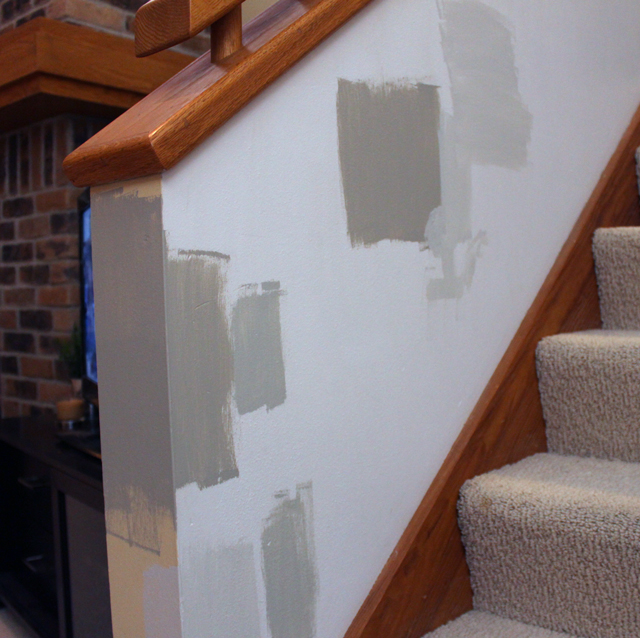
Here is our process of slapping samples on the walls… can’t wait to get rid of all the patchwork!

Update: I just had a genius thought. So on the Sherwin Williams screenshot above of the paint color I picked out, there lists a hexadecimal color value – something you can input into Photoshop. When I inserted the Mindful Gray value number, it gave me this lovely color:

grey with yellow undertone

Can you see that yellow undertone?! LOVE – because that is the other main color I’m looking to use. Soo my advice to you… When you find a grey you like, plug the hexadecimal value into photoshop and you’ll see the underlying color that will most likely show up on your wall depending on lights. If its a purple… run for the hills, unless that is your thing.

Dilemmas: Curtains & Rugs

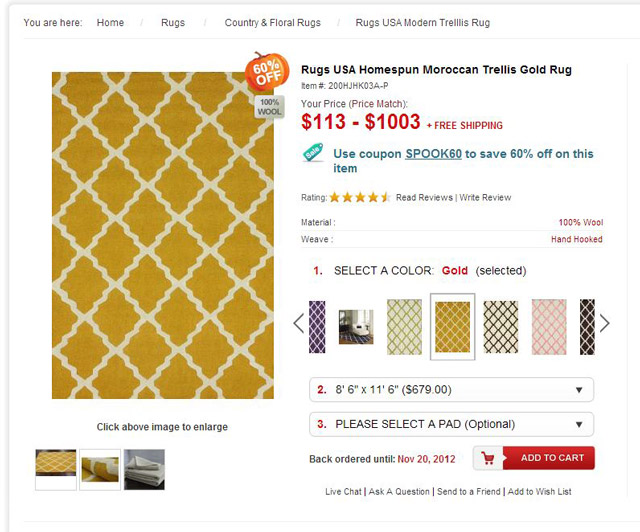
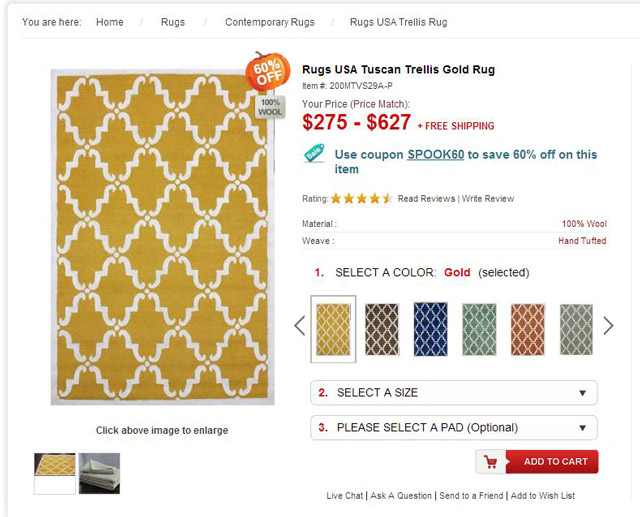
Mission #1:  Find a bright yellow geometric rug for our living room to coordinate with the couch, curtains, and more.

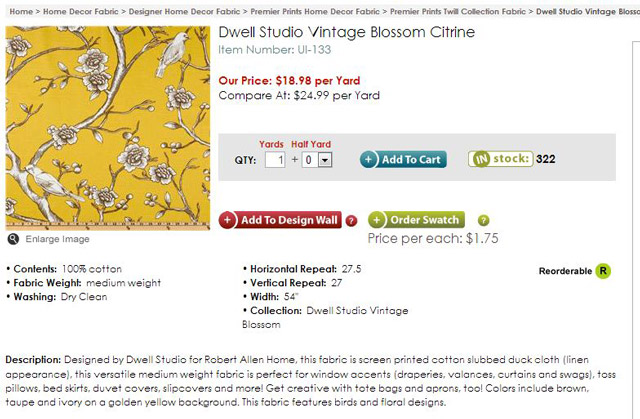
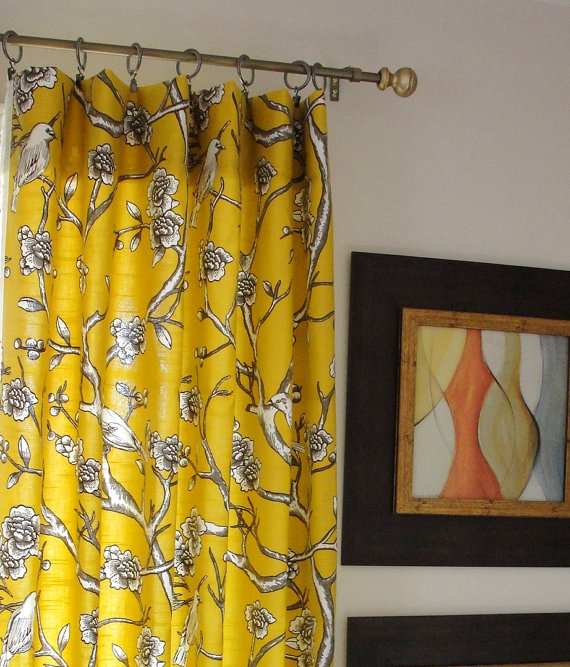
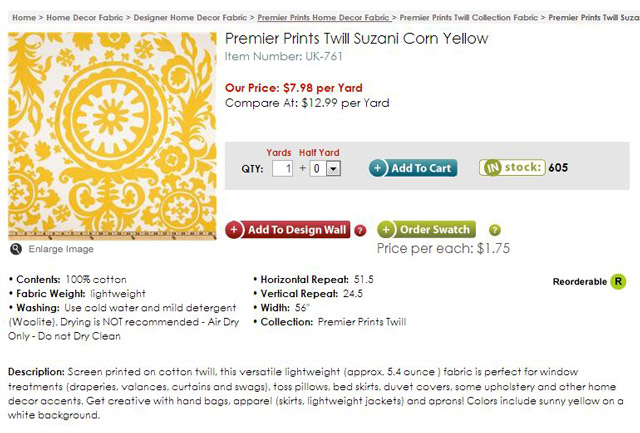
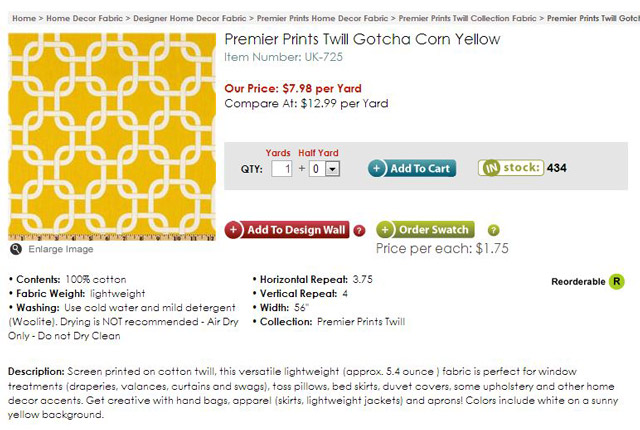
Mission #2: Find bright yellow curtains for our giant windows (2 are 108″ and 2 are 84″).

There are SO many options, so I’m hoping others can help me decide. We have yellow/gold chevron pillows, white pillows, dark grey couch and the walls will be a light to medium grey. I’m also doing some bold grey & white stripes on the far walls. Let me know which are your favorites!

RUGS (from RugsUSA.com all 60% off)
This one above comes in 8’6″X11’6″ and is only $271.60 + Free Shipping
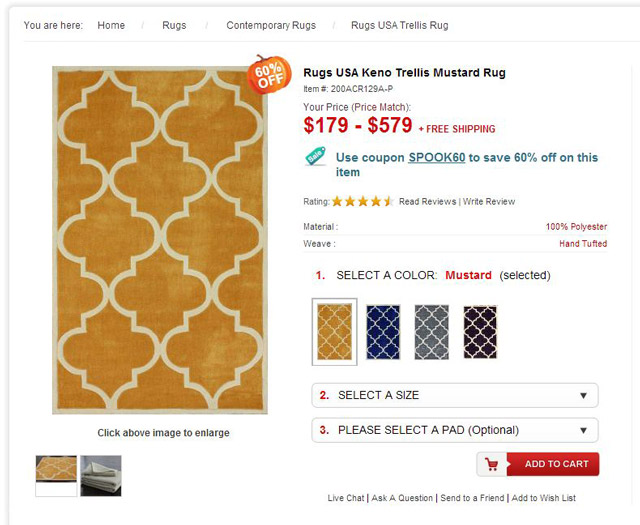
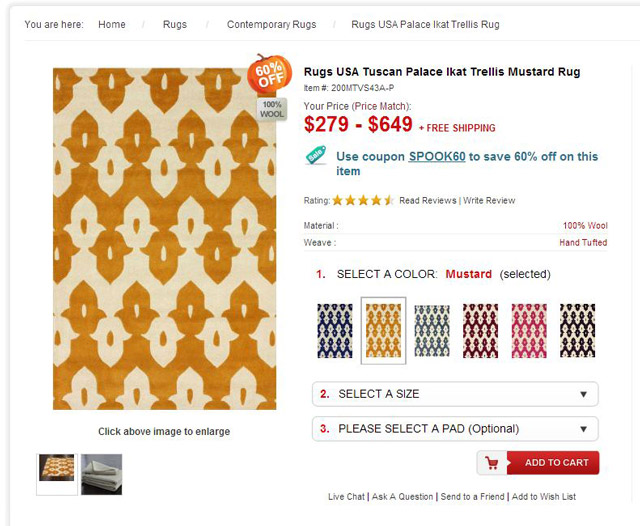
This one above comes in 8’3″x11″ for $231.60 + a Runner size 2’8″x10″ for $71.60 + Free Shipping.

This one above comes in 8’3″x11″ for $247.36 + Free Shipping.

This one above comes in 8’3″x11″ as well and is $255 + Free Shipping.

CURTAINS (from fabric.com)
(image above: etsy)


(image above: etsy)


Blast from the Past: Close Sisters

Me and my little sister Becky never really used to get along. She’d pick on me and beat me up, and yes you heard that right. Since we’ve all grown up a bit, got married, and now she’s become a mom – we tend to get along much better. All four of us actually enjoy hanging out together, they have become my closest friends.

Her husband, Josh is currently looking for a position as a children’s pastors. They’ve considered a few churches in other states and that honestly didn’t sit well with me. You’d think way back when we wouldn’t have cared where we all end up when we were grown up, but now that we all have our own lives, I’m glad we are all so close, and location-close. I couldn’t imagine them not being here for the day-to-day stuff + I do think it would be neat for all the cousins (all our future kids) to be able to grow up as close friends.