Backsplash Sneak Peek

We got a chance to start the backsplash while we had off work for Christmas and New Years! I totally forgot to whip out my nice camera during the process (since I was helping and all) but here are some few shots I took with my iPhone.

So here is the process of putting up the tile with pre-mixed thin set… grouting is next!

We love it so far. It seriously makes our kitchen look so rich and I’m sure this project will increase the value of our home a lot! And to think, this tile cost under $100! Also, one of my favorite parts so far is how little waste we had, since you can pop off penny rounds if you noticed an imperfection and replace with a perfect one, or when you cut them in half, you could use the other half elsewhere. Here is our pile of “waste”… which were ones that broke while trying to cut them in half. Not bad!

Shopping for the Kitchen

During the five minutes I’m not painting cabinet doors and drawers, I’m setting down my roller and brush and I’m thinking about the other pieces to our kitchen reno puzzle (ps I finally forced myself to start a puzzle this weekend as a way to unwind).

We have quite a lot decided on for our kitchen that my heart has been set on since before we officially bought our house….

But there are still a lot of final pieces left into question, like…

  • A new faucet
  • A new sink
  • New countertops
  • Island legs
  • How big to make our island
  • To paint the ceiling or to not paint it
  • Add a floor rug
  • and I’m sure many more to pop up as we continue on this adventure.

To refresh your memory, here is what our kitchen started looking like when we bought our place.

Here is what it looks like after we moved in…

Here is what it looks like currently…omg mess!

And…here is what our goal is…

Ok, now that we are all on the same page, This past week or so, I’ve been doing some shopping and research regarding a new faucet, new counter tops and new sinks. I literally was at Home Depot 5 times within 4 days, I’m obsessed. And Menards twice this past weekend.

I’m currently undecided on between two kitchen faucets, this Kohler one and the Moen one below. The both look pretty similar, and both have a great warranty – and both have great reviews. So now I just have to decide. Anyone want to help me decide?

Now onto counter tops! Looking at our neighborhood values, it really doesn’t make sense to install granite or a solid surface. We just won’t get that money back when we go to sell sometime down the line. So because of that, we are considering laminate + it works with our budget greatly (bonus!). The only concern we had with laminate was we really wanted an under mounted sink. I can’t stand how the top-mounted ones look. We assumed the only way to do this was to go the granite/solid surface route, but after doing some research, we think we may have found a way to go with laminate and an under mounted sink.

I found a blog, where the author showcases an undermount quartz sink from Karran sinks paired with laminate. We found a laminate we like that resembles concrete and are hoping to go with the same quartz sink. They also under mount acrylic and stainless steel – but we were just concerned with the longevity of those items and really loved the dark quartz color available. Doesn’t it look amazing?! So fingers crossed this can happen for us too and the price in the end is less than the solid surface + under mount sink.
Karran Seamless

Hopefully the next update on our kitchen will include the finished, painted cabinets – but those babies are taking FOREVER!

Pinterest Challenge: Napkins to Pillows

I have a few obsessions. Target, pillows, pinterest, and the blog Young House Love. Put them all together in a nice sandwich and you get a YHL Winter Pinterest Challenge where I take four napkins from Target and make two pillows.

It all started when I was working on transforming our lower level guest room and figuring out a color palette. I went to Target and since they had a million decor pieces in one of the hottest colors right now, coral, I decided coral and gray was my palette. I found lots of pillows with coral, but so much of it was geometric and so harsh. I was really wanting to add some floral when I found this Target floral print (below). However they didn’t have this print in pillows which I wanted, so what did I do… bought a pack of four napkins (20″x20″ each) for $9.99 and said I’d make pillows out of them… real funny since I haven’t touched my sewing machine in over 2 years.

So then I hopped on Pinterest and began searching for tutorials on how to make pillows from napkins… and I found many different methods. You can sew the pillow mostly with a machine and then the methods to close the pillow after the stuffing include hand sewing, velcro or putting in a zipper.

I was ambitious and thought a zipper would be the best way to close it, while making it still look nice. Here is the pillow tutorial I followed to a T… besides the fact that she didn’t use napkins, but napkins in my case just equaled a piece of fabric. PS I also learned that for zippers you use a “zipper footer” which so nicely came with my sewing machine.

I was crazy surprised how easy it was… even my mom (who is like a pro sewer) was impressed! So once that part was done, the rest was easy, just sew it shut. And I just used the existing hem as my guide which helped keep things pretty straight.

Then I just stuffed them full of soft stuffing that I picked up for about $3 and zippered them shut. Presto. I magically turned 4 napkins into 2 pillows.

And look who came to watch as I finished this project… his eyes were on the pieces of thread the entire time, he has eyes like a ninja. I’m thankful for a pet who loves craft time too!

Goals for 2013

The first of every year is a good time to reflect on what’s working for you and what’s not… what you had hoped to do in the past 365 days and what you forgotten about. I’m not one for making resolutions, but instead setting some realistic goals. So before I crank out the list for this year, let’s see how we came out in 2012…

TOGETHER GOALS FOR 2012:
1. Pay off Vanessa’s School Loansliterally finished this on the 31st
2. Take a vacationcruise!
3. Save up for a down payment on a house! – check and we bought one, so we should get bonus points
4. Get better at doing our laundry and keeping our house cleanso so on this, could use improvement still
5. Go rock climbing together – fail 🙁
6. Start to pay off Drew’s loans – Luckily we don’t have to start paying these until 1/8/13

DREW’S GOALS FOR 2012:
1. Graduate MSOE
2. Start at Milwaukee Tool
3. RelaxTook the past 11 days off, I’d say he’s relaxed

VANESSA’S GOALS FOR 2012:
1. Read a book in entiretyHunger Games 1 & 2
2. Blog more to document our livesSee for yourself
3. Sew something
4. Do less freelance

Now for 2013
TOGETHER:
1. Save up 3-6 months salary for our emergency fund
2. Pay off 1/3 of Drew’s school loans
3. Invite people over more to hang out as couples
4. Get a laundry schedule together – and fold after washing, not 2 weeks later
5. Go on a mini-vacation somewhere close

DREW:
1. Start Grad school in the Fall
2. Go to China for work
3. Hang out with my brother-in-laws more

VANESSA:
1. Enter a Minted design contest
2. Get my design etsy shop up and running
3. Get my car washed more
4. Finish updating my freelance website in hopes to do more this year
5.  Sew something
6. Draw/sketch more
7. Visit my sisters in MN and IL

HOUSE:
1. Finish painting trim white throughout house
2. Start and finish kitchen remodel
3. Update upstairs bathroom

Fingers crossed we can stick to these goals!

Remembering Miriam

When we were first house hunting, a sweet old lady and friend had passed away – though it was her time, she was well over 90 years old, she was the most precious little lady and is very much missed by many. Here is a photo of her from our wedding in 2010.

wedding photo candid mariamShortly after she passed, my mom was contacted by her relatives that they had a bunch of her furniture they were selling. Knowing we’d need much more furniture to fill our future house, I decided it would be a great opportunity to remember her and to get some really great mid-century modern furniture. It was also a steal of a deal, only about $300ish for two dressers, a hutch, a credenza, two night stands, a headboard and bed frame, and dining room table with six chairs. Some of it was in great condition, some had seen better days.

mid century modern decorated hutchCurrently, the hutch is in our kitchen which is holding a lot of extra dishes and kitchen appliances and showcases some colorful pieces. This one is in pretty good shape, a few dings, but I could probably easily get them out without having to start from scratch. It also has a laminate piece that wouldn’t sand and stain well anyways – and the color works in the space.

mid century modern cradenzaThe credenza is currently in our family room acting as a place to hold a lamp, decor and inside board games and puzzles. This one is also in pretty good condition. It is on my list to do something with it some day – no rush on this one though. I’m thinking about painting it somehow because it also has a laminate piece that won’t sand or stain well.

mid century modern dressermid century modern tall dresser
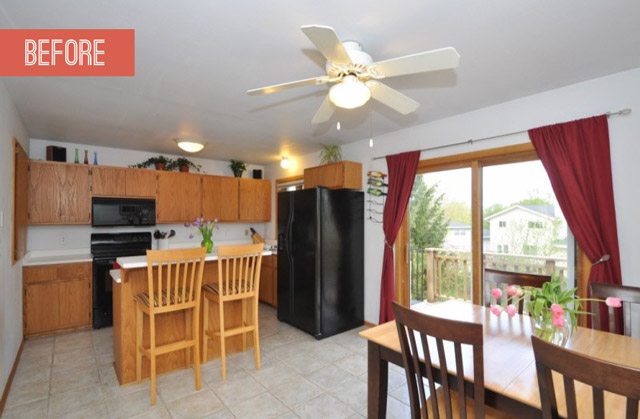
The dressers and the bed frame is in our spare bedroom downstairs. They are neatly positioned, but the room right now is just a dumping ground for excess stuff. Someday we’ll get to it.The kitchen table and chairs need a new home. We got them before we even knew what house we are getting, but we just don’t have a good space for them in this house. I’m still deciding what I want to do with them – they may very well end up craigslist. They are chilling in our basement until then.

Now onto the nightstands. Those found a home in our bedroom because we were previously just using Ikea Lack tables and those aren’t the greatest things in the world. These two nightstands didn’t match, but that is what also makes them more unique. However, they were pretty badly damaged with water stains and chipped pieces. They also were a much lighter color than our dressers in the same space. So I decided I’d try refinishing them. You know because I’ve done it soo many times before. Ha.

So based on my extensive research (ha.. or pinterest), I picked up sandpaper, stain in the jacobean color, and some water-based polyurethane. After sanding for a few minutes thinking this was going to take an eternity, I remembered my dad had an orbital sander. Dad to the rescue! That helped speed things up a ton. However since this was my first time refinishing a nightstand, I learned the hard way how deep you actually have to sand it to get it to accept the stain evenly. Because of that mistake, after staining it, the stain was really sticky and I had to basically re-sand everything.

Once I finally had it sanded properly, I applied two coats of stain – wiping them off each time after about 20 minutes and waiting a day in between. Then after everything was good and dry, I applied three coats of poly, waiting a few days in between for everything to dry completely. I also then waited another 3 days before I put the nightstand back in our bedroom ready to be used.

It looks a million times better, there are no more water stains or marks and it now blends in better with our other furniture. I just finished the other nightstand the other day as well – it too looks a million times better and the process went much more smoothly thanks to my lesson learned.

Check out the before and afters below:

mid century modern night stand before and aftermid century modern night stand before and aftermid century modern night stand before and aftermid century modern night stand before and afterAnother fun thing, I found a bunch of random things hidden in the nightstands – they must have fallen out of the drawers at one point and got caught in between. Such cute little notes and memories. This one was a set of matches with a note from someone that said “Something to keep the home fires burning!” and the matches were from Roberts Restaurant, I believe an old historic restaurant in Milwaukee, that is no longer there.

roberts-milwaukee-photoI think it would make Miriam very happy knowing that I ended up with a bunch of her old furniture and I’m very thankful for the opportunity to have it!

Cheaper Ice Cream – Saving $

The word on the street is that we have started to save up to buy a house. And that is true. Saving for a down payment is daunting at the moment, and we’re trying our best to see where we can save a bit of moolah. We keep a close eye on our budget thanks to Dave Ramsey and Mint, but we know there are other ways we can adjust our lifestyle for a time period to save even more. We’re hoping to share with you some ideas and tips we discover along the way.

I (Vanessa) absolutely love Culver’s custard – it is by far the best ice cream out there. My favorite is to get 1 scoop of chocolate custard in a dish and then mini m&ms sprinkled on top. However, eating ice cream from a fast food joint ain’t cheap – no sir. That little treat can easily cost $3 a trip + then Drew usually gets something, which then equals $6. And while a little splurge here and there is nice – I’ve discovered a cheaper route. While it’s not as yummy as Culver’s, I do sleep better at night.

ice cream savings aldis culvers m&ms

Every other week, I go to Aldis to stock up on the necessities, PS if you haven’t tried Aldis, you are throwing your money away. Each time I go I pick up a small carton of their Chocolate Ice Cream ($2.62). Then about every other week or two, I visit our Walmart food center to pick up the items that Aldis doesn’t have. There I pick up a bag of Mini m&ms ($3.00 ish). So for a total of $5.62 I get about 10 small bowls of my favorite ice cream, instead of $3 each time. Plus one bag of the mini m&ms last more than with just one gallon. I’d say you have to buy more m&ms every 3 or so gallons. Do the math, and you can see that it is cheaper to opt for the DIY ice cream 🙂