
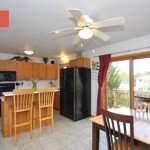
It’s been a long time since I had this photo saved from the blog 4Men1Lady of their chalkboard wall wanting to someday do something like this once we owned a home. So finally the time had come – It was going to be a must in our kitchen as it would work with the color schemes of yellows, white cabinets and light blue/teal walls.

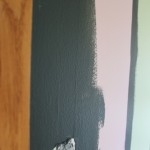
I bought 2 quarts of Rustoelum Chalkboard Paint. We did our best to follow the directions. First we needed to sand down the wall to ensure a smoother writing surface – Thanks Drew for doing that! Then my mom applied two coats of the paint – I was busy painting the ceiling in another room at the time.
Once it was dry for 3+ days, you condition the walls as per the instructions. That means you take a piece of chalkboard (I got sidewalk chalk for this) and rub the whole entire wall on the chalk’s side. You then pretend you erase it or smudge it into the wall with a cloth. This prevents “ghosting” and ensures it erases future artwork. It says if you ever wash the wall (with water) that you need to condition it again the same way, but to allow 7 days of drying before conditioning it.
So far the instructions have held up. We’ve drawn and erased easily! Here is the how the process looked… sorry some of these were from my phone and at different times of the day, so the lighting is a bit different.


 I’ll be sure to post more of what I write/draw on the wall – I’ve found tons of inspiration from Pinterest, I just have a hard time picking what to do first and next!

i used you as an example in my design class today, someone mentioned chalkboard paint and people didnt believe it exists so i showed them your blog 🙂 yay looks good
Haha, thanks 🙂